Understanding crops and bleed
Like many specialist professions, printing has its own set of unique terms that you might not be familiar with. But don’t worry, we’re here to explain everything! Two that often come up are ‘crops’ and ‘bleed’. Here’s a short explanation.
Printers Crop Marks Explained
Whatever we print for you, be it a leaflet, brochure, business card or something more bespoke like a presentation box, it’s always on a larger sheet than the dimensions of your job. That’s because the printing machines need space around the edge to hold on to. Once the print is done, this means we are left with a border right the way around that needs to be cut off to get your finished job. Making sure to leave this border is a key thing that people commonly forget when creating artwork for print.
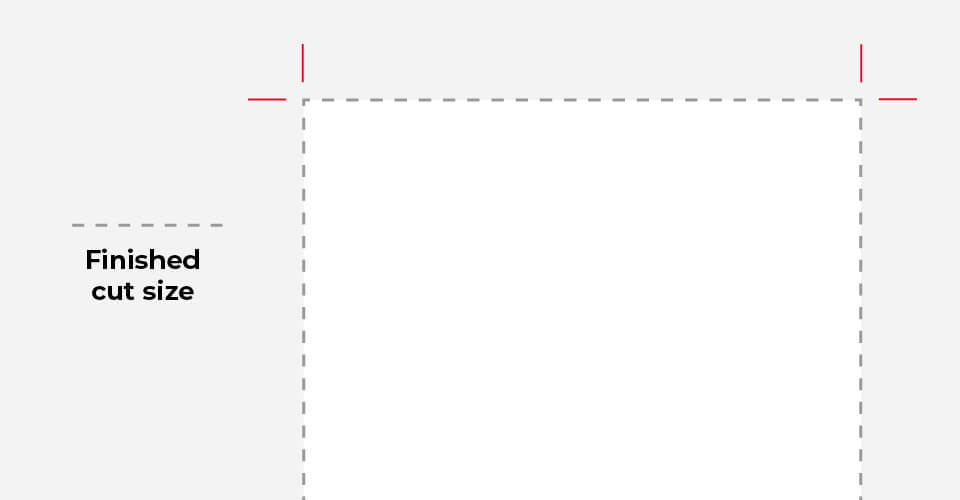
To make sure we know the exact dimensions to cut to we need lines that clearly show the corners indicating how you want the final printed piece to look. These lines are the ‘crops’. They’re what we use to set the guillotine to cut your job to exact size once it’s printed.
Printers Bleed Explained
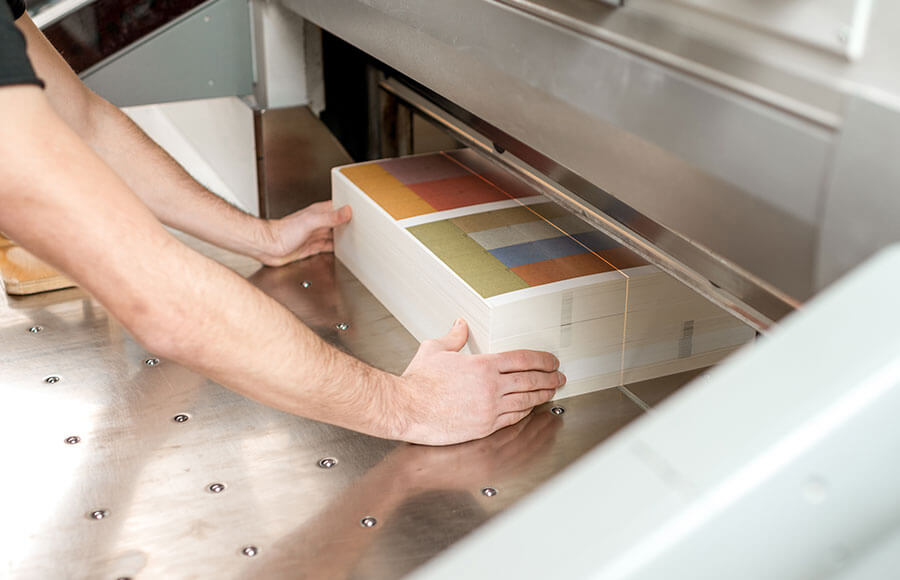
Whilst printing these days is a very exact science, cutting still needs a little tolerance. Imagine a pile of 1000 printed sheets ready to be guillotined. The guillotine blade cutting down over hundreds or sometimes even thousands of sheets will bend very slightly. Depending on the thickness of the paper being cut, from the top of the pile to the bottom, the blade can move out by up to 0.5mm. So no matter how precise the printing and how carefully all the sheets are aligned, when we come to cutting to size there will be fractional movement.
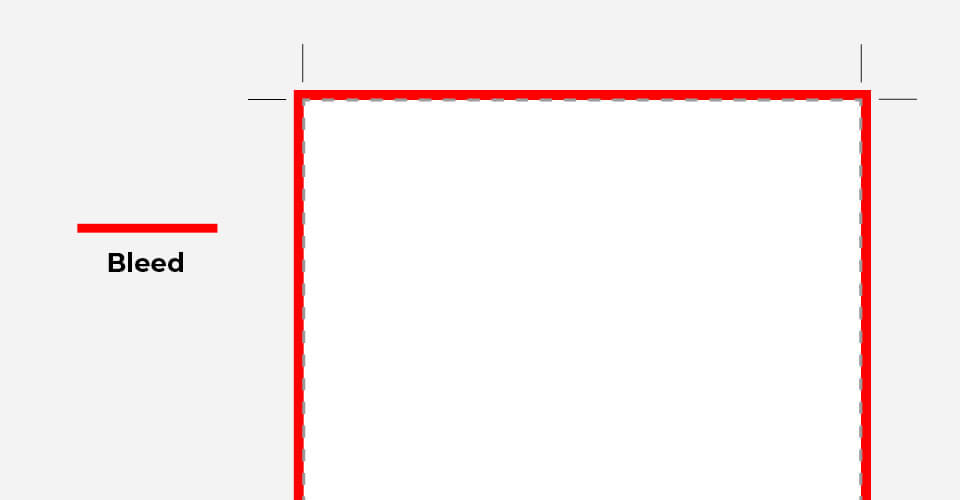
This is where we come to the ‘bleed’. If your printed image stops exactly on the cut line, it’s inevitable that when we come to cut to size some of the sheets further down the pile will have a tiny sliver of white edge showing due to that movement of the guillotine blade. To avoid this we need the image to run over the line we will be cutting. We call this ‘bleeding’. Usually the images ‘bleed’ right to the edge of the sheet. Typically, that distance is 3mm.
The end result? A nice tidy cut and your print job looks perfect.